
Tuesday, May 31, 2011
Saturday, May 28, 2011

Thursday, May 26, 2011
Lens Cleaning
Lens Cleaning can be a pain in the butt, although very necessary if you want to take good pictures that do not have lens smudges in them. I recently purchased the lens pen which is a carbon based lens cleaning tool. The lens pen comes in a variety of sizes, but the original lens pen and mini are good choices for most cleaning uses on camera lenses. They are great because they use carbon to remove oily smudges/fingerprints and dust which gives a long use time of the lens pen. The other great reason of this product using carbon is that you can keep this in your camera bag and not have to worry about the product freezing, melting, or dripping. the pens also have a retractable soft brush at the other end to brush away any loose carbon that could be on the lens. I purchased the Outdoor Pro Kit which includes the original Lens Pen and the mini along with a microfiber cloth (another great accessory to have), the antifog cloth, and a case to hold all the items. Check out their site and their products.
 |
| Original Lens Pen |
 |
| Retractable Soft Brush |
 |
| Cleaning Tip using carbon compound to eliminate oils and dust |
Tuesday, May 24, 2011
Splash of Color
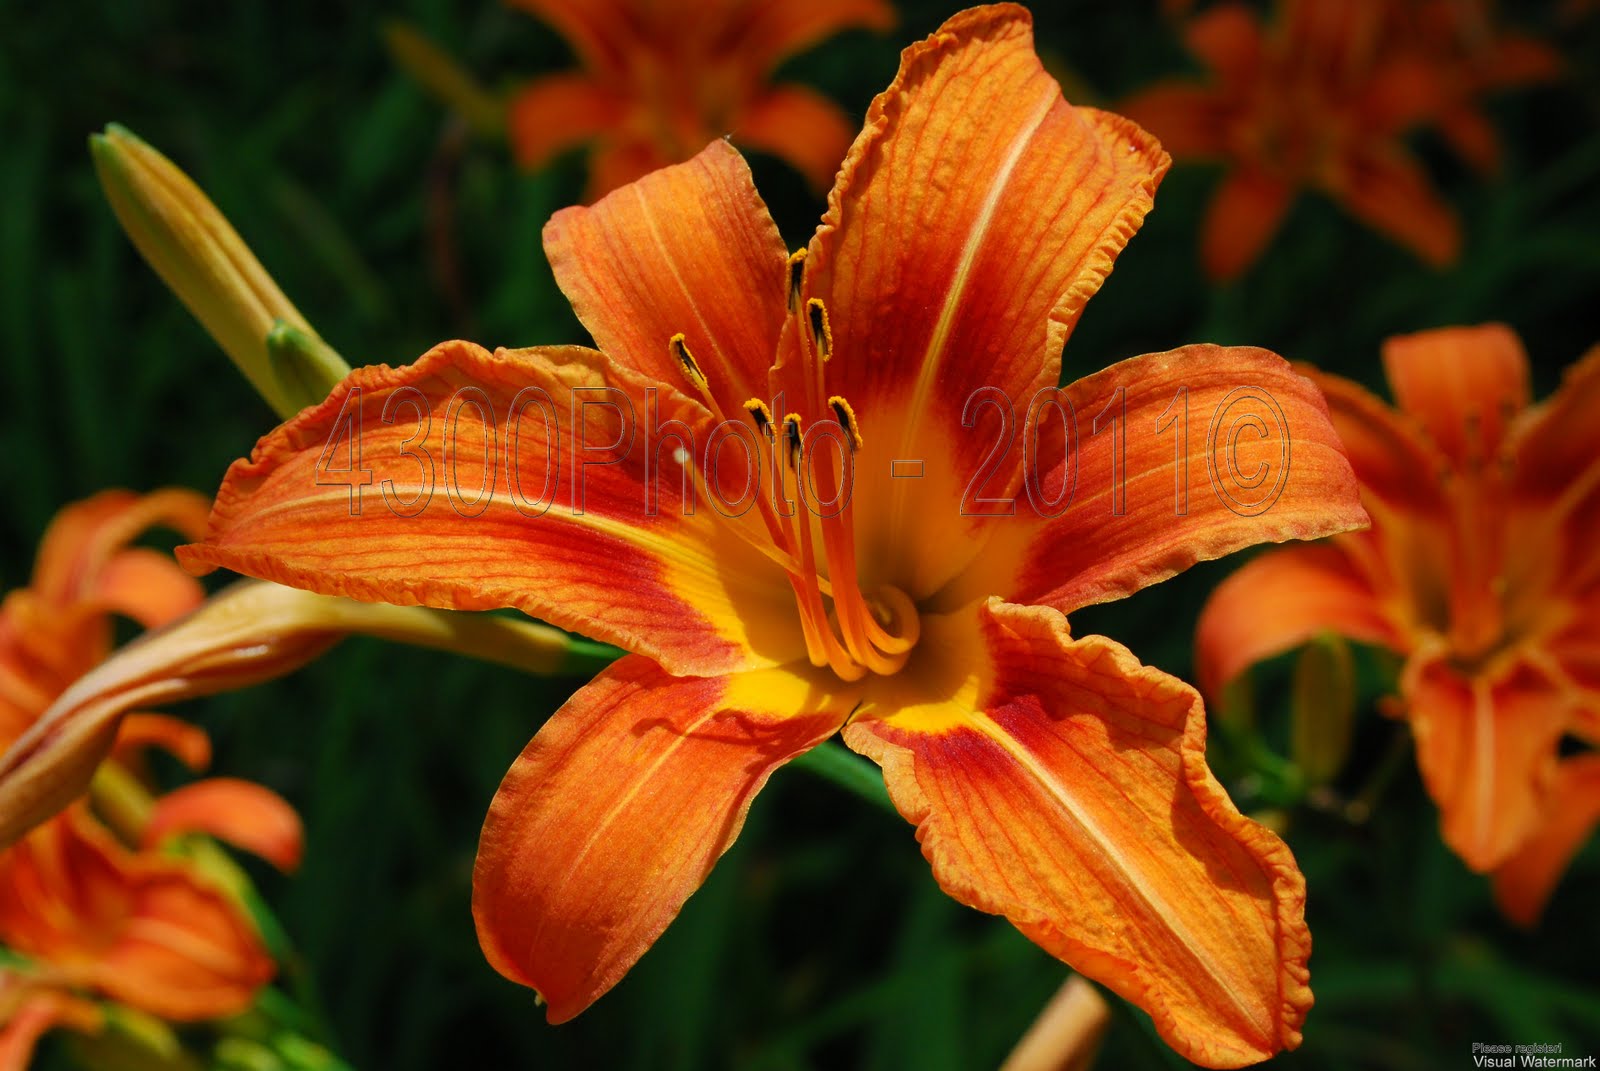
It has been grey and rainy for for most of two weeks out here in Utah (which is unusual for the state for any season for this long), so I figured I would post a a colorful pic. This is some type of lily I photographed last year during the summer near Pittsburgh.

Monday, May 23, 2011
Urban Biking
While wondering around the SLC Urban Arts festival this weekend, I captured some single speeds up against the chain link fence.


Thursday, May 19, 2011
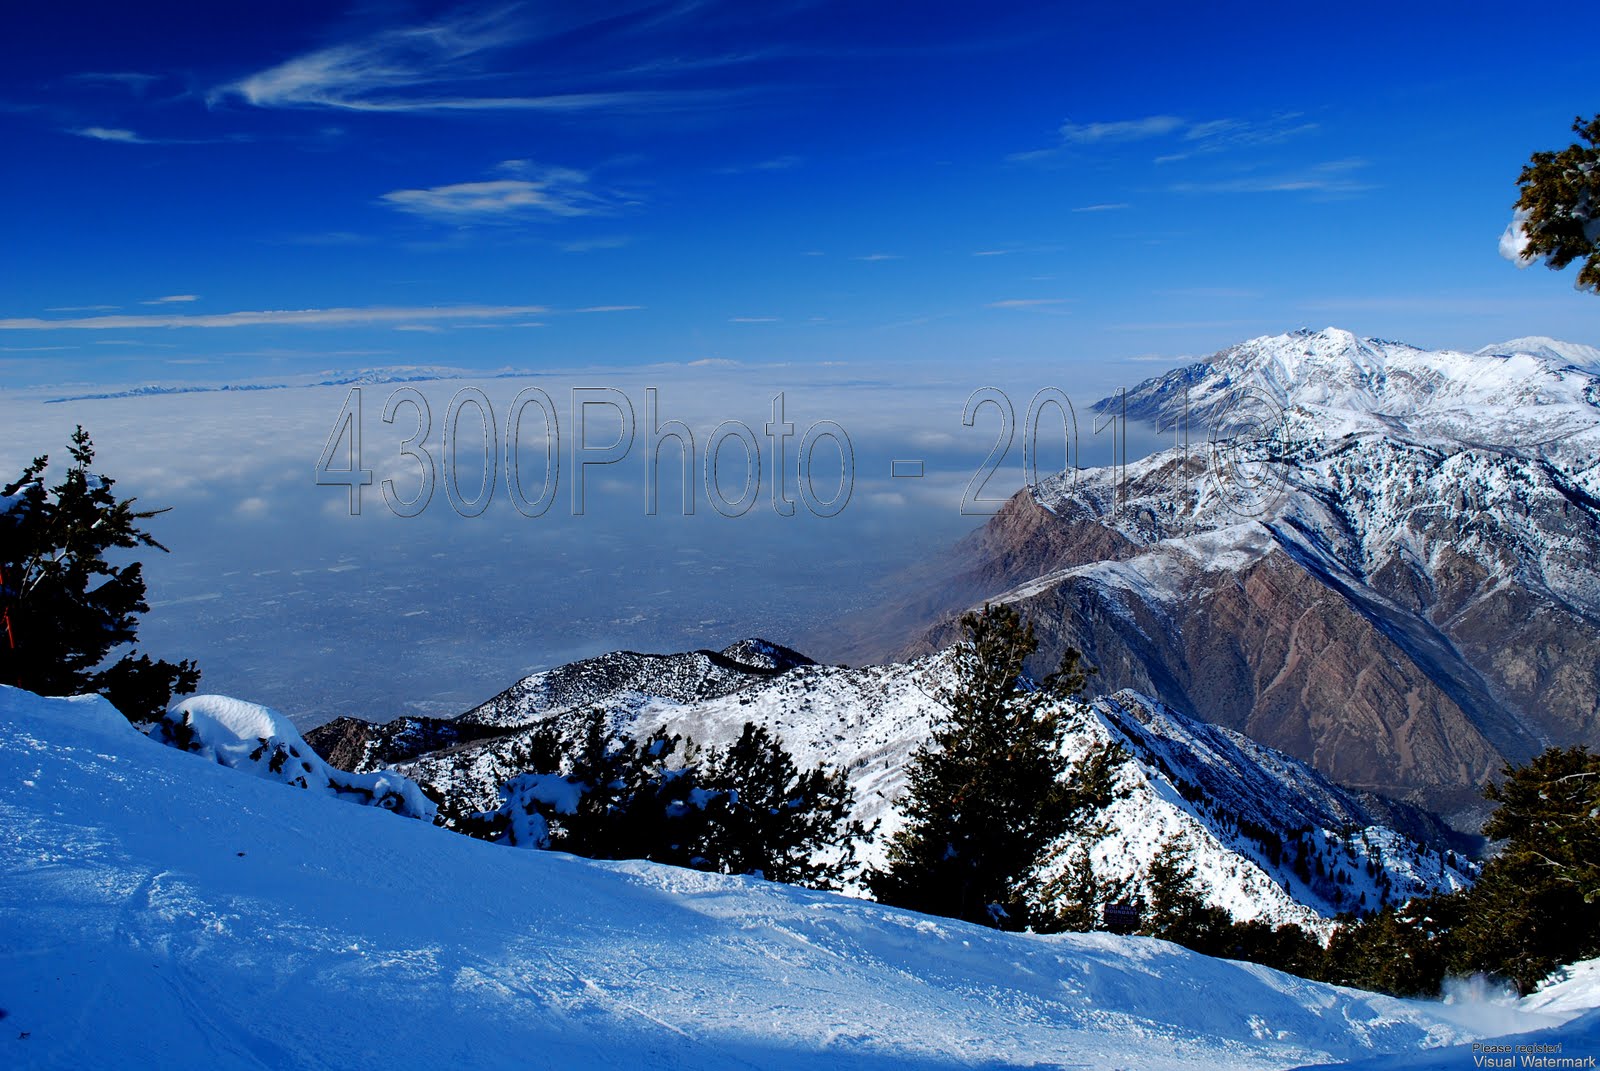
Ogden from Above
This picture was taken in January from Mt. Ogden during an inversion day for the Ogden area hence the low hanging cloud like formations. It was a bluebird day above 7000 ft!

Wednesday, May 18, 2011
Mountain Road
I was going through the "archives" and saw this photo that was taken back in November in the Wasatch Mountains. It was taken in the afternoon during a sunny day which clouds were rolling in around the mountains in the Snowbasin area.


Monday, May 16, 2011

Sunday, May 15, 2011
Snow Snails
Spring/Summer has arrived and it is time for the snow snails to appear. Snow snails is destabilized snow that starts to peel away from steep slopes rolling down creating the spiral snail shell shapes.


Friday, May 13, 2011
Bike Season
Just finished cleaning the mountain bike to only just get it dirty again, but why not start the season with a fresh start.


Tuesday, May 10, 2011
Utah Rocks!
You may have been expecting something different from this post, but I thought the unusual find was cool enough to share. This rock was found on the side of the Bonneville Shore Line Trail on the bench of the Wasatch front. I found it interesting to find Utah shaped rock laying by the trail.


Monday, May 9, 2011
Creating Action Sequence Shots
I figured I would publish a step by step tutorial on creating an action sequence shot from a series of photos. What I found when trying to create my own was that all of the tutorials and posts on how to create these photos were all based on single POV pictures. Meaning that when taking pictures of say a snowboard jump, you would focus in the main part of the jump and start taking continuous shots of the jump while the rider rides and jumps through your field of vision. There are many tutorials on how to cut out the image of the rider and overlay that image to the first photo or using features in Adobe Photoshop to layer all photos on top of each other, but there has been very little on how to do a panning action sequence shot. I used some of the methods in the other tutorials and experimented until I was able to create an action shot that I have seen in many snowboard magazines.
Below are the steps and methods I used to create images like this one.

Tools Used:


Below are the steps and methods I used to create images like this one.

Tools Used:
- DSLR Camera. (Place the camera in the continuous shooting mode to capture multiple pictures of a moving object. Each manufacturer has a different way to change to the shooting mode, so consult your instruction manual if you are unsure of how to change this).
- Microsoft ICE (Image Composite Editor) – This can be downloaded for free from the following location Microsft ICE.
- Image Manipulation Software – You can use Adobe Photoshop or in my example GIMP. GIMP is a free open source image manipulation software and can be downloaded from the following link; www.gimp.org
- The fist step is to create the “photo canvas” as I will call it. The “photo canvas” is stitching together all of the photos related to a sequence so that we can add any missing photos of the subject in action. To accomplish this step, we will be using the Microsoft ICE software to stitch together your action shots related to the sequence that you want to create.
- Open the Microsoft ICE software and click File > New.
- Select all of the photos that make up the sequence. I personally like to create a new directory in the directory of that days photos and place all of the pictures that are going to be stitched in the sub-directory. I find that it makes it easier to find all related pictures at a later date if you go to use them for something else along with stitching them together.
- The Microsoft ICE software will take care of creating “canvas” by stitching and blending all photos together. You should be left with something like the screenshot below. As you can see some of the action shots of the subject are missing, but that is OK since will add those in the next steps. Do not try to crop out the grey areas around the pictures, we will make these black or a different color. Go ahead and save the stitched photos “canvas” by hitting the “Export to Disk” button.

- The next step is to open the “canvas” file in an image editor (GIMP, Photoshop, etc). I will be using GIMP for this tutorial.
- After you have opened the “canvas”, you need to find the first photo where the action subject is missing. This should be relatively easy since you would have shot these photos in continuous mode which would name each picture file sequentially.
- Open the picture of the missing action subject in the image editor. Zoom into the action subject so it will be easier to select that specific part of the picture to place onto the “canvas”.
- Select the Free Select Tool or “Lasso” from the toolbox in GIMP.
- Using the “Lasso” tool, select the action subject from the picture (the snowboarder in this example). When trying select or lasso a part of an image that is not square, the easiest way to select the image is to click around the contours of the image you are selecting in sequence all the way back to the original point. This technique will allow you to select the part of the image you want with very little of the back ground. See the image below.

- Once the image has been selected, go and do a copy. After you have copied the selected image to you clipboard, go the “canvas” picture that you have opened in a different session of your image editor and do a paste to the “canvas” picture. This will place the selected action image that you placed on the clipboard onto the “canvas” image. You can then move the pasted image to the correct location on the canvas as shown below.

- Repeat those steps until you have added all the missing action images to the “canvas”.
- Once all the missing images have been added to the “canvas”, select Layer > Merger Down from the menu to merge all pasted images to the “canvas”.
- If you need make the background around the entire completed picture a different color, you can use the paint tools (paint brush or bucket fill) to change the colors.
- The Final step is to save the “canvas” image as the completed action shot.
Saturday, May 7, 2011
End of the Season
Evidence of a great season in the Wasatch Mountains this season. Completed day 73 on the slopes today!


Subscribe to:
Posts (Atom)