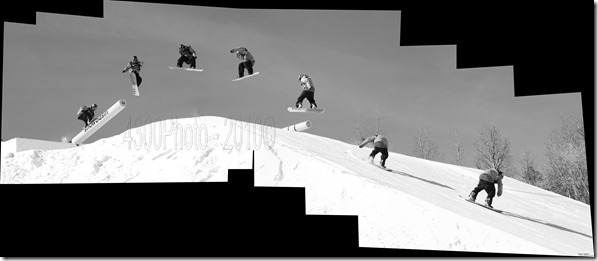
Below are the steps and methods I used to create images like this one.

Tools Used:
- DSLR Camera. (Place the camera in the continuous shooting mode to capture multiple pictures of a moving object. Each manufacturer has a different way to change to the shooting mode, so consult your instruction manual if you are unsure of how to change this).
- Microsoft ICE (Image Composite Editor) – This can be downloaded for free from the following location Microsft ICE.
- Image Manipulation Software – You can use Adobe Photoshop or in my example GIMP. GIMP is a free open source image manipulation software and can be downloaded from the following link; www.gimp.org
- The fist step is to create the “photo canvas” as I will call it. The “photo canvas” is stitching together all of the photos related to a sequence so that we can add any missing photos of the subject in action. To accomplish this step, we will be using the Microsoft ICE software to stitch together your action shots related to the sequence that you want to create.
- Open the Microsoft ICE software and click File > New.
- Select all of the photos that make up the sequence. I personally like to create a new directory in the directory of that days photos and place all of the pictures that are going to be stitched in the sub-directory. I find that it makes it easier to find all related pictures at a later date if you go to use them for something else along with stitching them together.
- The Microsoft ICE software will take care of creating “canvas” by stitching and blending all photos together. You should be left with something like the screenshot below. As you can see some of the action shots of the subject are missing, but that is OK since will add those in the next steps. Do not try to crop out the grey areas around the pictures, we will make these black or a different color. Go ahead and save the stitched photos “canvas” by hitting the “Export to Disk” button.

- The next step is to open the “canvas” file in an image editor (GIMP, Photoshop, etc). I will be using GIMP for this tutorial.
- After you have opened the “canvas”, you need to find the first photo where the action subject is missing. This should be relatively easy since you would have shot these photos in continuous mode which would name each picture file sequentially.
- Open the picture of the missing action subject in the image editor. Zoom into the action subject so it will be easier to select that specific part of the picture to place onto the “canvas”.
- Select the Free Select Tool or “Lasso” from the toolbox in GIMP.
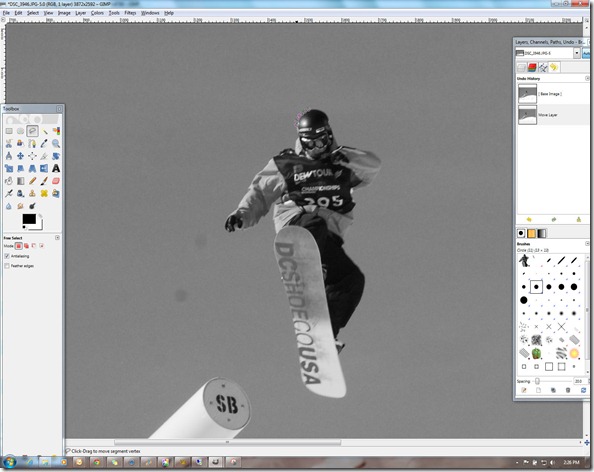
- Using the “Lasso” tool, select the action subject from the picture (the snowboarder in this example). When trying select or lasso a part of an image that is not square, the easiest way to select the image is to click around the contours of the image you are selecting in sequence all the way back to the original point. This technique will allow you to select the part of the image you want with very little of the back ground. See the image below.

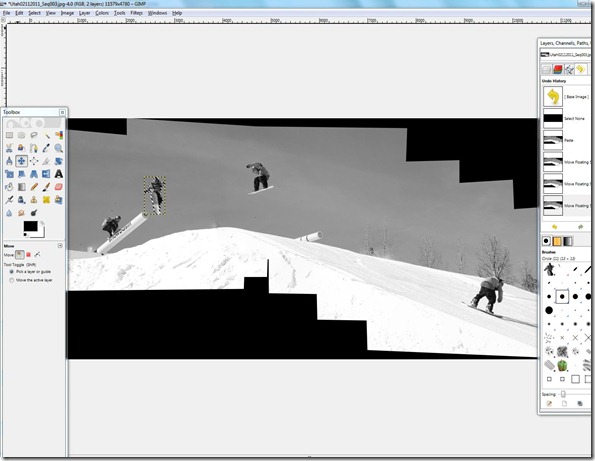
- Once the image has been selected, go and do a copy. After you have copied the selected image to you clipboard, go the “canvas” picture that you have opened in a different session of your image editor and do a paste to the “canvas” picture. This will place the selected action image that you placed on the clipboard onto the “canvas” image. You can then move the pasted image to the correct location on the canvas as shown below.

- Repeat those steps until you have added all the missing action images to the “canvas”.
- Once all the missing images have been added to the “canvas”, select Layer > Merger Down from the menu to merge all pasted images to the “canvas”.
- If you need make the background around the entire completed picture a different color, you can use the paint tools (paint brush or bucket fill) to change the colors.
- The Final step is to save the “canvas” image as the completed action shot.
Hello.
ReplyDeleteGreat post. I really like making these action sequence panoramas. Two other things to suggest:
1) You can export to a PSD from ICE. The PSD file will contain the "canvas" as well as the individual source images as layers (but all correctly positioned). Then, if GIMP supports PSD, you can grab the missing action from these layers instead of refering back to the sources.
2) The latest version of ICE supports video as an input. In addition the video import UI lets you select portions of the input video frames that you want retained in the output (for example the snowboarder in certain positions). See my blog post here for more info: http://hdview.wordpress.com/2011/04/05/microsoft-ice-updatevideo-to-panorama-lens-vignette-improved-blending/
Matt,
ReplyDeleteThanks for the info. I will have to give your suggestion a try and update the post.
Thanks!